Setup
DeepStack config
Adjust options and tests to run as needed.
See my DeepStack training post for details about sorting out how to get set up with the right matching package versions.
docker run -e VISION-FACE=True -e VISION-DETECTION=True -e VISION-SCENE=True -v localstorage:/datastore -e MODE=Medium -v /deepstack/mymodels:/modelstore/detection -v /deepstack/myfaces:/DeepStack/Faces --name DSfaces -p 82:5000 deepquestai/deepstack
docker run -e VISION-FACE=True -e VISION-DETECTION=True -e VISION-SCENE=True -v localstorage:/datastore -e MODE=Medium -v C:\DeepStack\MyModels:/modelstore/detection -v C:\DeepStack/myfaces:/DeepStack/Faces -p 82:5000 deepquestai/deepstack
Options are:
| Option | Means |
|---|---|
| -e VISION-FACE=True | Do face detection |
| -e VISION-DETECTION=True | Do object detection |
| -e VISION-SCENE=True | Do scene detection |
| -e MODE=Medium | Mode to run in. Same as Blue Iris options (High/Medium/Low) |
| -v /deepstack/mymodels:/modelstore/detection | Where custom models are. Note maps local path outside of Docker /deepstack/mymodels to container path /modelstore/detection |
| -v /deepstack/myfaces:/DeepStack/Faces | Where known faces images are. Note maps local path outside of Docker |
| -v localstorage:/datastore | This specifies the local volume where DeepStack will store all temp data. Note maps local path in user space outside of Docker |
| --name DSfaces | Name to use to interact with image. Random name is assigned if not given. Note will fail it image with that name already exists on your system. |
| -p 82:5000 | External port:internal one. Internal is always 5000 and 82 is assumed external port by BI. |
| deepquestai/deepstack | Name of cloud image to use. |
| --gpus all deepquestai/deepstack:gpu | If using the gpu version you will want to use. |
deepstack --VISION-FACE True --VISION-DETECTION True --VISION-SCENE True --MODE Medium --MODELSTORE-DETECTION "c:/DeepStack/MyModels" -PORT 82
Get install from here and put all the custom models in c:\DeepStack\MyModels
DeepStack: Version 2021.09.01 with these APIs enabled
/v1/vision/custom/actionnetv2
/v1/vision/custom/dark
/v1/vision/custom/licence-plate
/v1/vision/custom/openlogo
/v1/vision/face
/v1/vision/face/recognize
/v1/vision/face/register
/v1/vision/face/match
/v1/vision/face/list
/v1/vision/face/delete (not tested yet)
/v1/vision/detection
/v1/vision/scene
/v1/backup
/v1/restore (not tested yet)
For further help/info see this debug guide
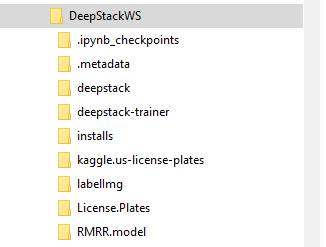
Is a top level folder (DeepStackWS in my case) with the repos underneath. So it would look something like this
labelImg For details see labeling data for object detection yolo
Configuration options for DeepStack utils in config.py
Set these values as needed / to match your setup.
dsUrl = "http://localhost:82/"
mode = "Medium"
imgPath = "test.imgs/"
debugPath = "debug.pics/"
trainPath = "../RMRR.model/train/"
newPicPath = "new/"
Usually the same as the name of the pt file. RMRR is mine from the data in the checked in the RMRR.model train folder. trainedName = "RMRR"
Folder where images with found objects and their mapping files are put by quickLabel and read by chkClasses
labeled = "labeled/"
Folder where images with no found objects are put by quickLabel and read by chkClasses
unlabeled = "unlabeled/"
debugPrintOn = "N"
saveDebugPics = "Y"
failOnError = "Y"
includedExts = ['jpg', 'webp', 'bmp', 'png', 'gif']
detection is the built in model
tests2Run = ["detection", "custom/openlogo", "custom/licence-plate", "custom/dark", "custom/actionnetv2"]
#Yolo Format:
In the above,
object-class is class_id, not name. The ID is the line number of the class in the classes.txt file, starting with 0.
x is the x-axis center of the object in pixels / image width in pixels. Like % from left
y is the y-axis center of the object in pixels / image height in pixels. Like % from top
width is the width of an object / image width in pixels. Like % of frame
height is the height of an object / image height in pixels. Like % of frame

For a deep dive look at Collect and Label Images to Train a YOLOv5 Object Detection Model in PyTorch and How to Train YOLO v5 on a Custom Dataset